Introduction:
In this guide, our developer at HikeBranding will walk through setting up a Zapier webhook that triggers whenever an invoice is marked as paid in Zoho Books. This automation will then update the corresponding Keap contact, ensuring that payment status and related details are always up to date. By implementing this workflow, businesses can enhance efficiency, reduce manual data entry and improve customer relationship management with minimal effort.
Automated Invoice Tracking:
Instantly capture invoice payments in Zoho Books and send the data to Zapier for seamless processing.
Error Reduction:
Eliminate manual data entry to minimize mistakes and inconsistencies.
Workflow Automation:
Save time by removing manual data entry, reducing errors and streamlining operations for increased efficiency.
Real-Time Updates:
Maintain accurate and up-to-date customer information without delays.
Customizable Triggers:
Define specific conditions in Zapier to determine when and how invoice data is processed.
Platforms:
We used Zoho Books, Zapier and Keap for this automation.
Automation Process:
When an invoice is paid in Zoho Books, a webhook sends the payment details to Zapier. Zapier then processes the data and updates the corresponding contact in Keap.
Steps:
1. Zapier Setup:
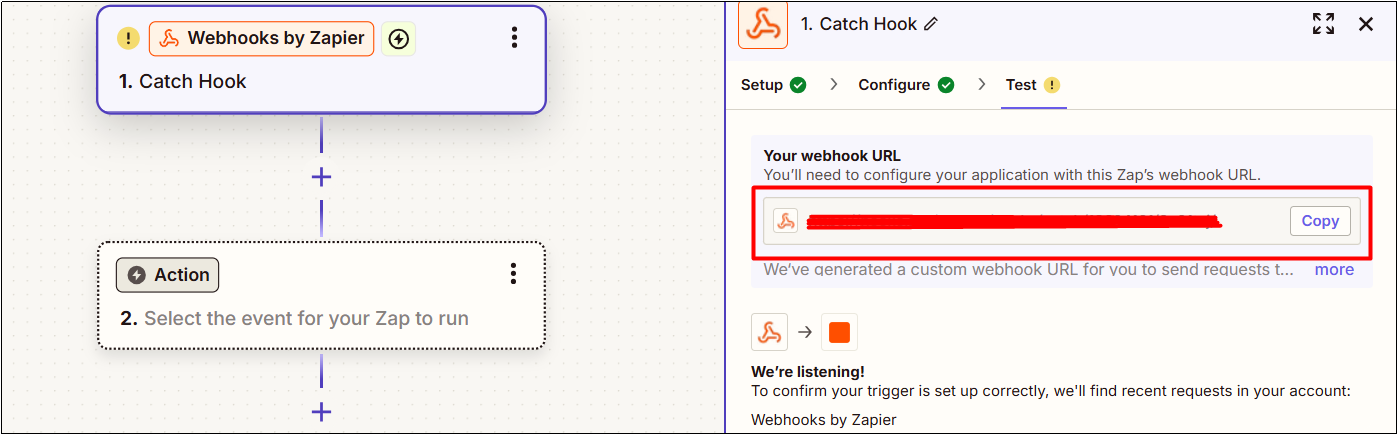
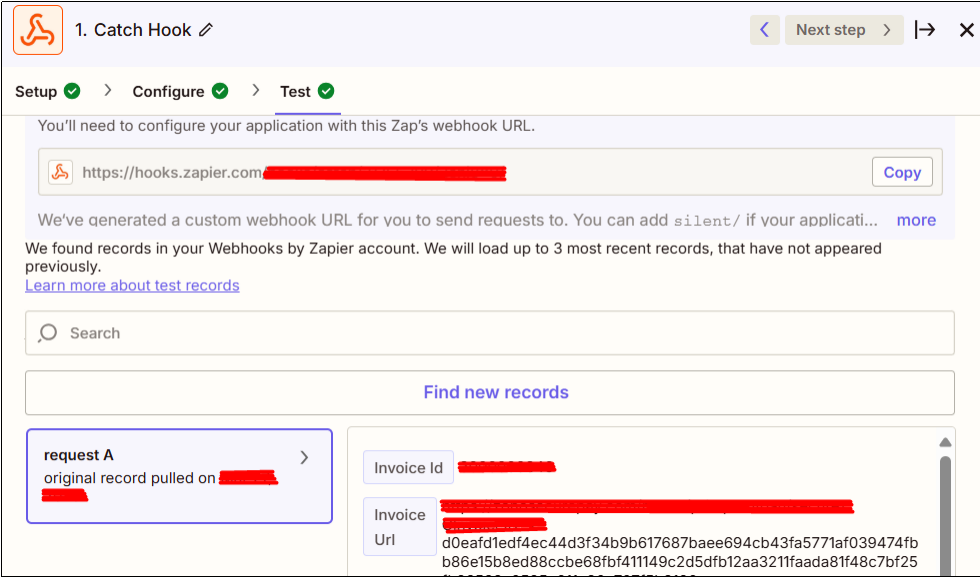
- Create a new Zap and select Webhooks by Zapier as the trigger app.
- Choose the Catch Hook option.
- Copy the webhook URL generated by Zapier.
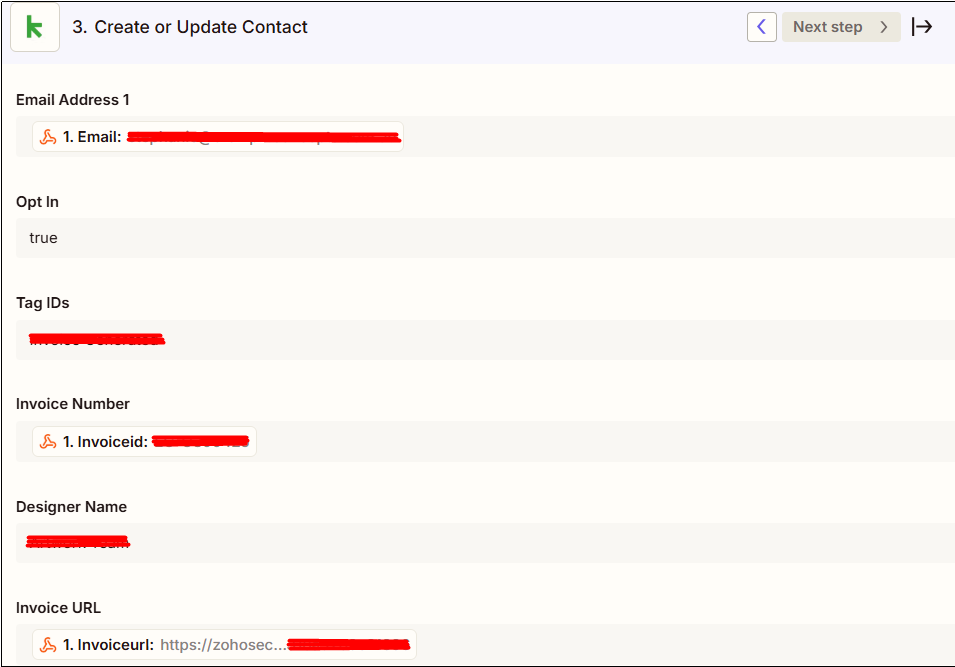
- Select Keap as the action app and choose the Create or Update Contact event.
- Map the necessary fields from the trigger app to the corresponding contact fields in Keap.
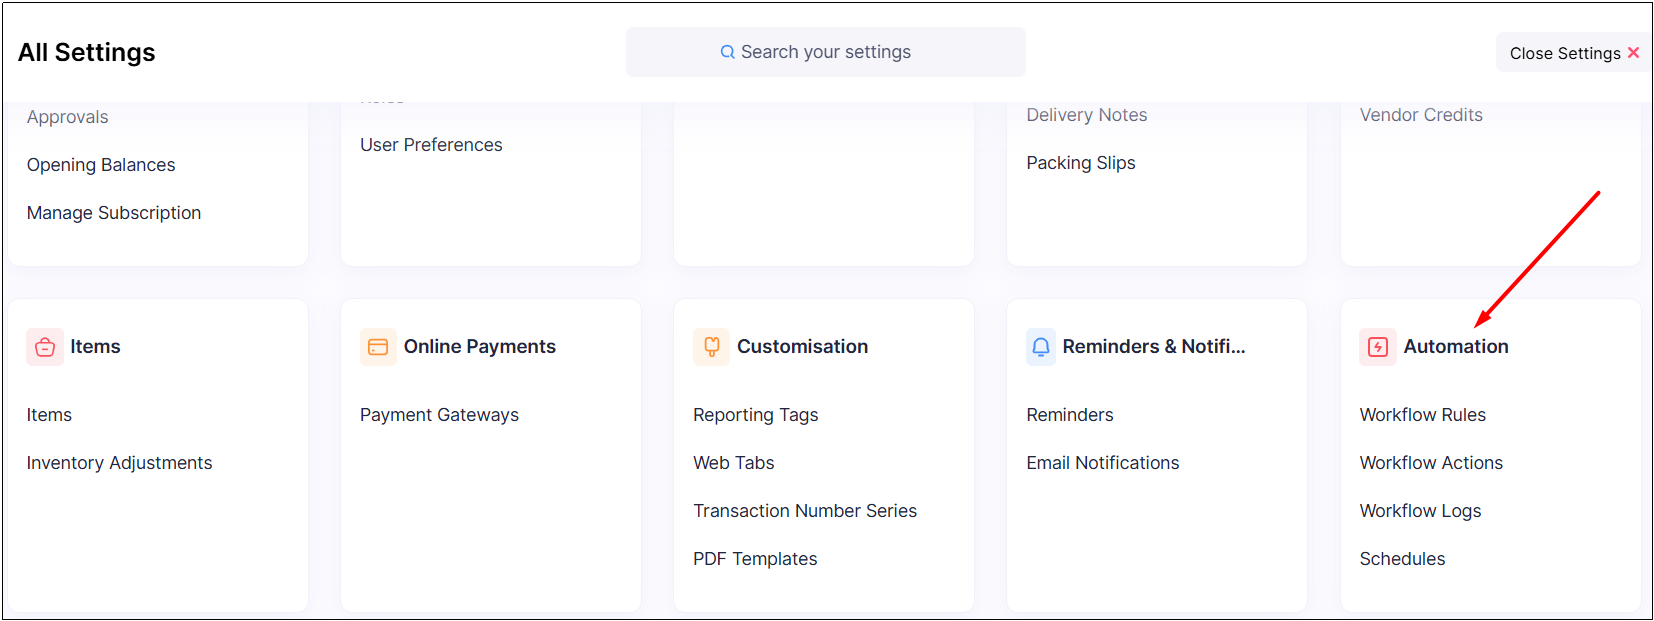
2. Zoho Books Setup:
- Go to Zoho Books Settings and select the Automation section.
- Choose Workflow Actions and select Webhooks.
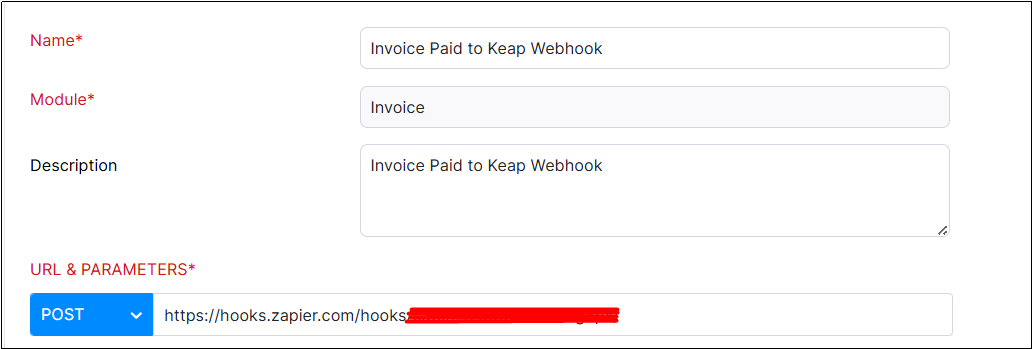
- Click on the New Webhook provide a name and select the Invoice module.
- Enter the Zapier Webhook URL and choose POST in the URL section.
- In the Headers section set the key and value as required.
- Select the appropriate Authorization Type.

- In the Body section choose the x-www-form-urlencoded option.
- Set the key-value pairs for the data you want to send.

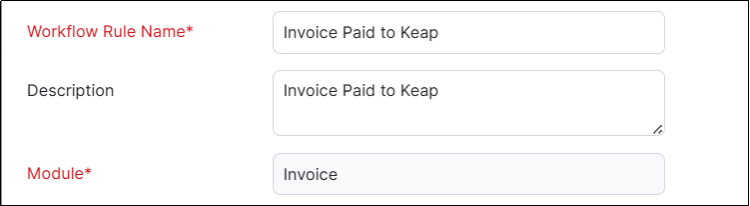
- Go to Workflow Rules and add a new workflow rule.
- Provide the Workflow Rule Name and select the Invoice module.
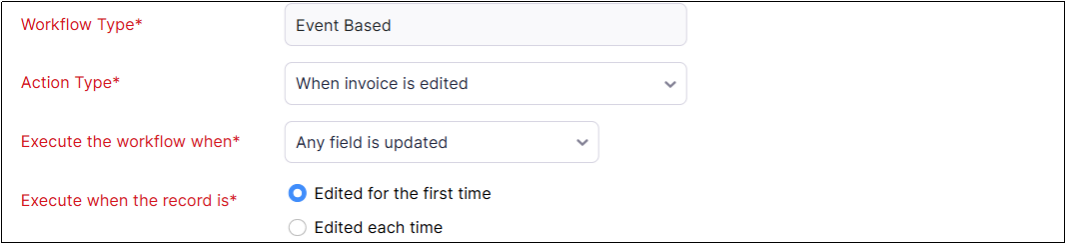
- In the Workflow Rules Action section choose Webhook as the Action Type.

- Configure the details in the Trigger section and add the Workflow Criteria.

Results:
1. Zapier Webhook
2. Keap

Conclusion:
Automating contact updates when an invoice is paid using Zapier webhooks streamlines processes and enhances data accuracy.As mentioned by our developer at HikeBranding, this integration not only saves time but also ensures that records are consistently kept up to date without manual intervention. By leveraging the power of automation you can focus on building stronger relationships and driving growth.