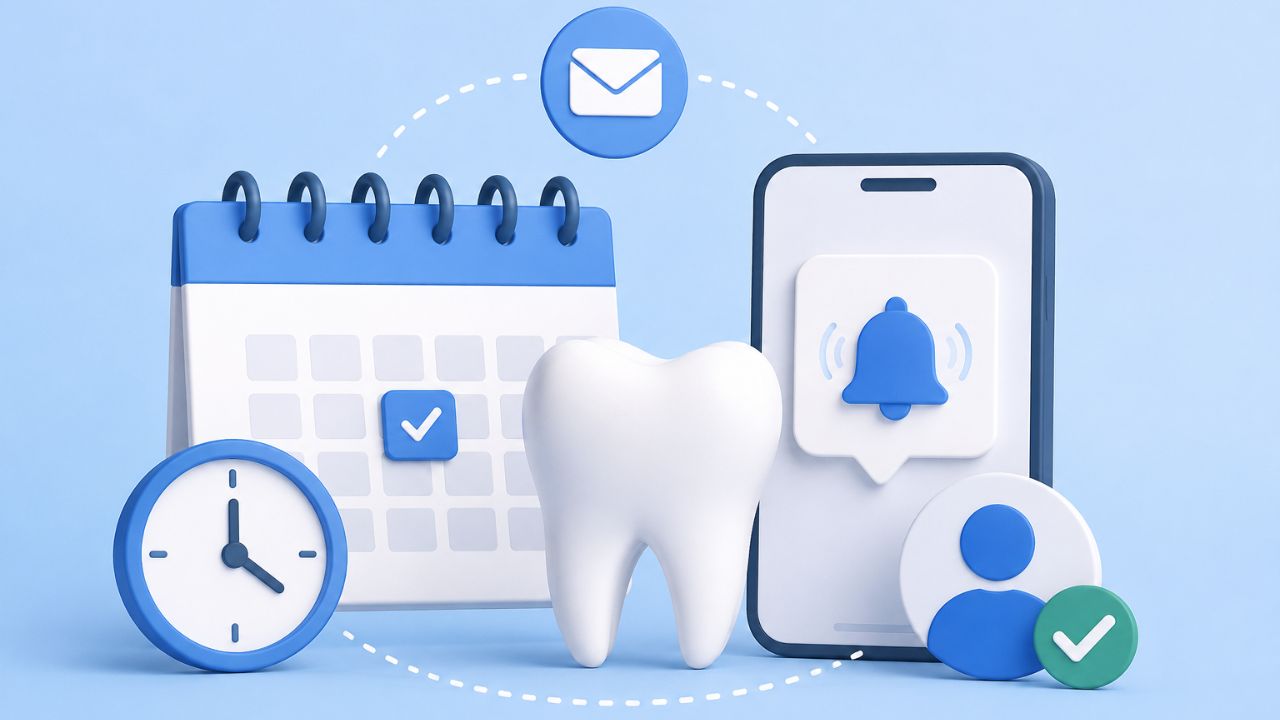
Introduction:
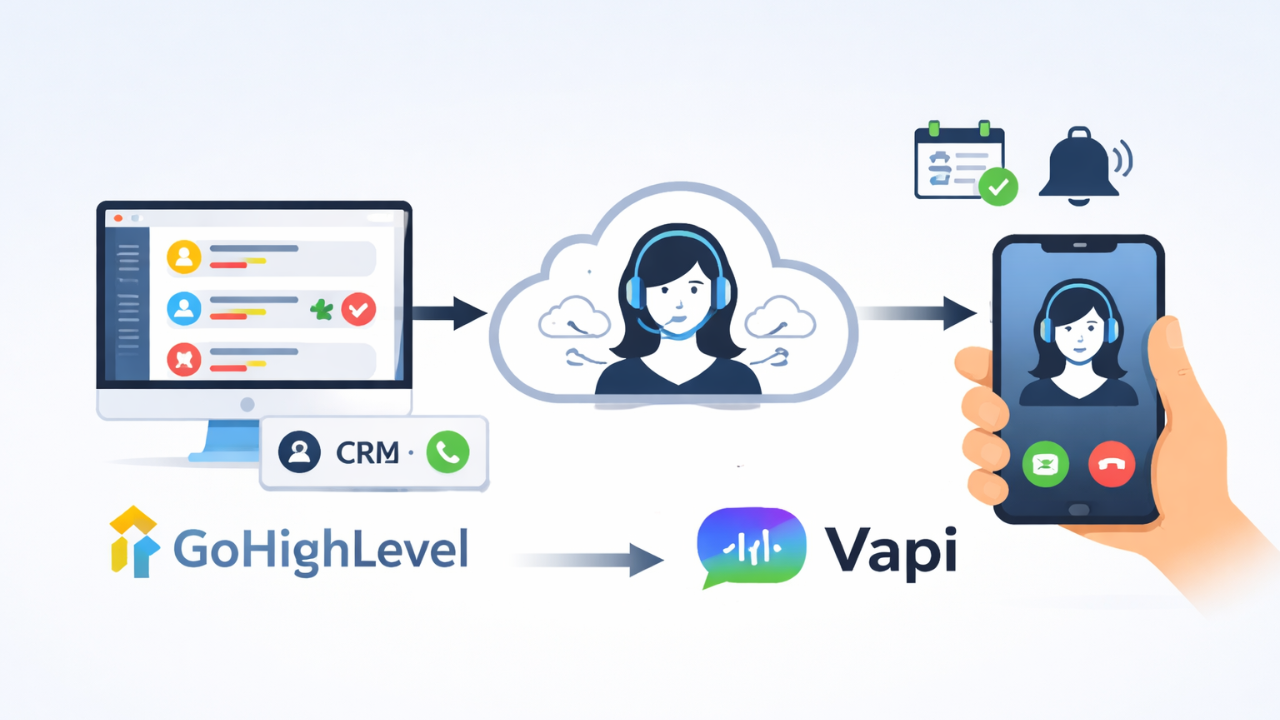
Efficient patient data management is crucial for any healthcare practice. If you’re using Keap as your CRM and DrChrono as your EHR, manually transferring data between the two can be time-consuming and error-prone. By leveraging Zapier, along with the DrChrono API and a Keap campaign, you can automate this process seamlessly. In this article, developers at Hike Branding shall explain, how to set up a Zapier webhook that automatically creates a new patient in DrChrono whenever a new contact is added in Keap.
Automatic Patient Creation:
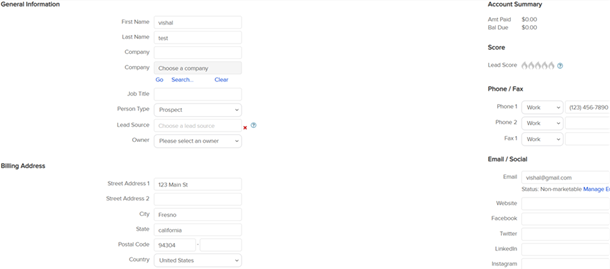
A new patient record is automatically created in DrChrono every time a new contact is added to Keap.
Real-Time Syncing:
Ensure that patient information is updated in real time between Keap and DrChrono.
Time-Saving Automation:
Save valuable time by automating the data transfer process, reducing administrative tasks, and allowing your team to focus more on patient care.
Error Reduction:
Minimize human errors commonly associated with manual data entry, resulting in more accurate and reliable patient records.
Scalable Automation
Easily scale your automation as your practice grows—add new integrations or adjust workflows without any hassle.
Platforms Used
We used Keap, Zapier and DrChrono to automate the patient creation process.
Automation Process:
When a contact is added in Keap, Zapier sends the information to DrChrono via the API and creates a new patient record automatically.
Steps:
1. Keap Setup:
- Navigate to Settings and select Tags under the CRM section.
- Click Add Tag then enter a tag name and description.
- Go to Marketing and choose Automation Builder from the top menu.
- Click Create a New Campaign and give the campaign a name.
- For the trigger step in the campaign, drag “Apply Tag” from the sidebar into the workflow and select the tag you created.
- Drag the “Sequence” element into the workflow and connect it after the tag.
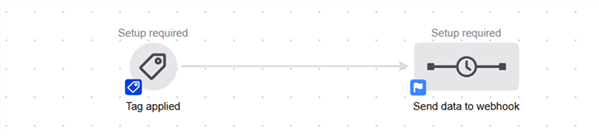
- Inside the sequence, add a “Send HTTP Post” action.
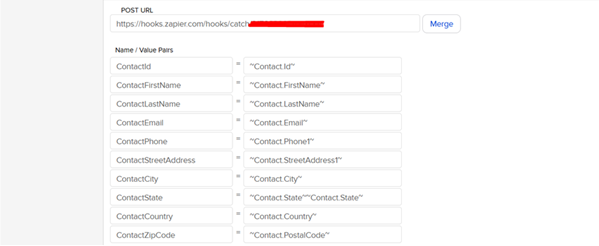
- Enter the Webhook URL in the POST URL field.
- Add the Key-Value Pairs along with the corresponding Merge Fields.
- Finally, click Publish to activate the campaign..
2. DrChrono Setup:
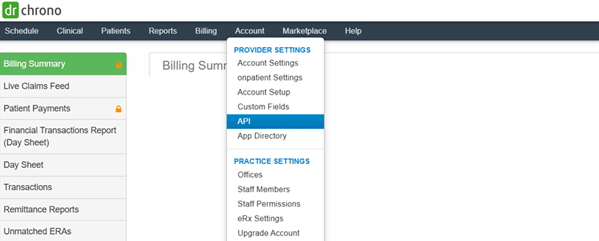
- Log in to your DrChrono account.
- Navigate to the API section under the Account menu.
- On the API Management page, click “New Application.”
- Enter the Application Name and set the Redirect URIs.
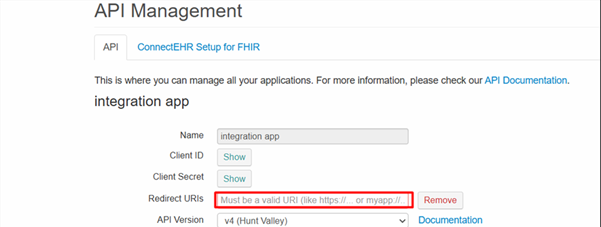
- Use the Client ID and Client Secret to generate an Access Token..
- Generate the token.
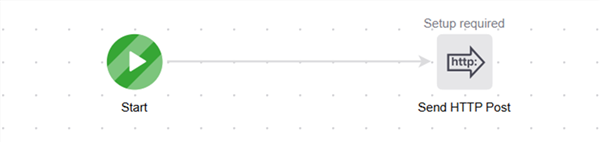
3. Zapier Setup:
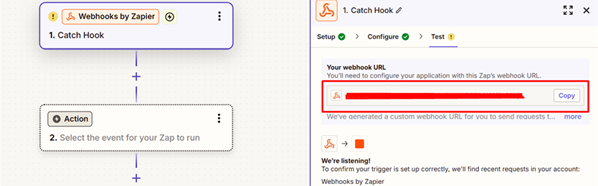
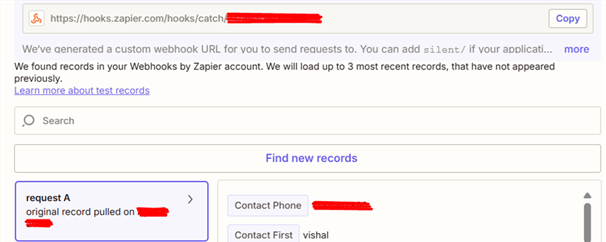
- Create a new Zap and set Webhooks by Zapier as the trigger app.
- Select the “Catch Hook” trigger option.
- Copy the Webhook URL generated by Zapier.
- Add another Action and select Webhooks by Zapier.
- Choose the POST method in the Action Event.
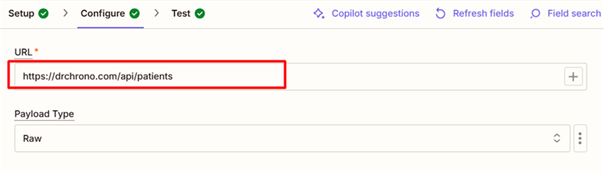
- Enter the DrChrono API URL in the URL field.
- Select Raw as the value for Payload Type.
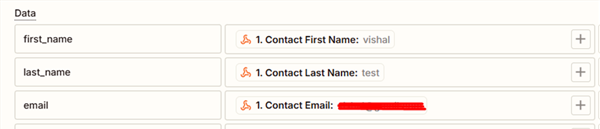
- Enter the key-value pairs in the Data field.
- Map the trigger values into the corresponding data value fields.
- In the Header section, enter the following key-value pairs:
- Authorization: Bearer your_access_token_here.
- Content-Type: application/json.

Results:
1. Zapier Webhook
2. Keap
3. DrChrono

Conclusion:
Automating patient creation between Keap and DrChrono using Zapier simplifies your workflow by reducing manual effort and minimizing errors. Setting up this integration ensures that patient data is updated in real time, enhancing both efficiency and accuracy within your practice. This seamless connection by Hike Branding, allows you to focus more on delivering quality care rather than handling administrative tasks. With automation in place, managing patient information becomes effortless, helping your practice operate more smoothly.